UART decoder plugin
What it does
cicwave-uart is a small, complete plugin that decodes
UART bytes from a waveform: a logic-analyser channel, a scope capture or a
simulated TX pin. It lives in
examples/cicwave-uart
and is meant to be copied as the starting point for your own protocol
decoder.
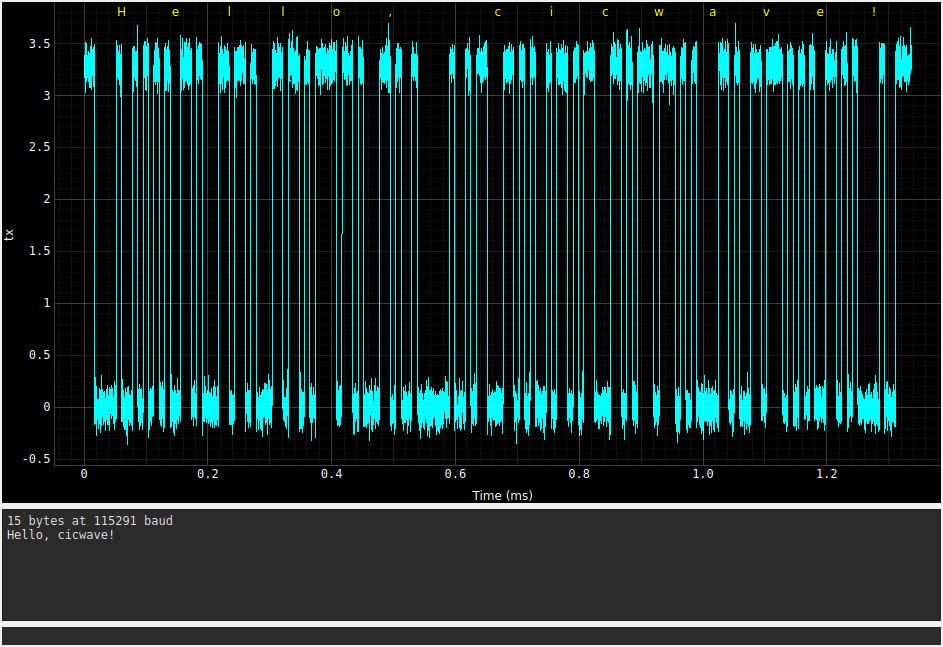
It adds one entry, Decode UART…, to a wave’s right-click menu. The decoded bytes are drawn over the waveform in a new tab:
Trying it
cd examples/cicwave-uart
pip install -e .          # next to an installed cicwave
python make_demo.py       # writes uart_demo.csv
cicwave uart_demo.csv
make_demo.py writes “Hello, cicwave!” as 8N1 at 115200 baud, sampled at
10 MS/s, on a 3.3 V line with 0.1 V of noise.
-
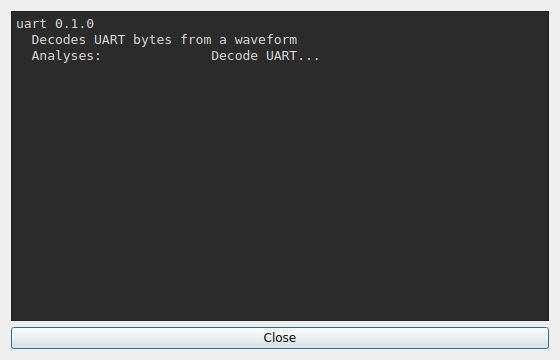
Help → Plugins confirms that cicwave found the plugin:
-
Right-click
txin the browser and choose Decode UART…. The plugin estimates the baud rate from the waveform and asks you to confirm it: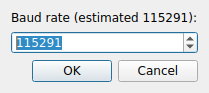
-
A tab named
UART: txopens. Each decoded byte is written above its frame, in yellow, or red on a framing or parity error. The readout under the plot gives the byte count, the baud rate used and the decoded text. Zoom in to check individual frames: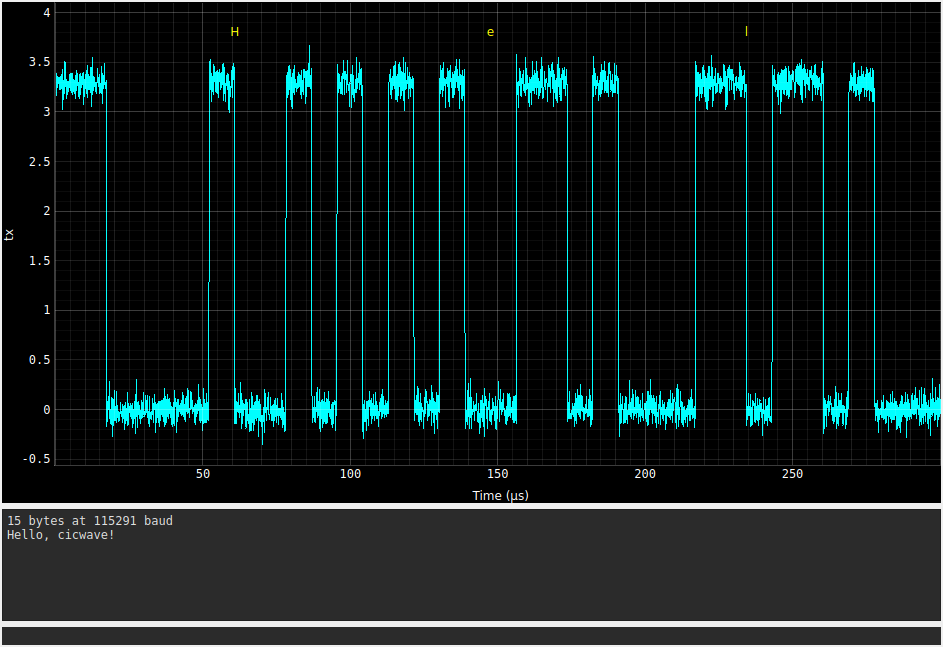
The first frame is
H(0x48): a start bit, the data bits0 0 0 1 0 0 1 0sent LSB first, and a stop bit.
How UART works
UART (Universal Asynchronous Receiver/Transmitter) sends bytes one bit at a time over a single wire per direction: TX on one side goes to RX on the other. There is no clock line. Both sides agree on the speed in advance, and the receiver re-synchronises on every byte.
The line idles high. With nothing to send, the line sits at logic 1 (3.3 V in the demo).
The baud rate is the bit rate. At 115200 baud one bit lasts 1/115200 ≈ 8.68 µs. The two ends must agree to within about ±2–3 %.
One frame
The common format is 8N1: 8 data bits, no parity, 1 stop bit. This
is H = 0x48 = 0100 1000, the first frame in the zoomed screenshot
above:
idle  start  b0  b1  b2  b3  b4  b5  b6  b7  stop  idle
 1     0     0   0   0   1   0   0   1   0    1     1
‾‾‾‾\_______________/‾‾‾\_______/‾‾‾\___/‾‾‾‾‾‾‾‾‾‾‾‾
       |<-------------- 10 bits = 86.8 µs ------------->|
- Start bit (0). The falling edge from idle marks the start of a byte. It is the receiver’s only timing reference.
- Data bits, LSB first.
01001000goes out reversed, as0 0 0 1 0 0 1 0. - Parity bit (optional). An extra bit that makes the number of 1s even or odd, to catch single-bit errors.
- Stop bit (1). Returns the line to idle, so the next start bit is always a fresh falling edge.
Ten bits carry eight bits of data, so 115200 baud moves 11520 bytes/s.
Reading a frame
A receiver:
- waits for a falling edge on the idle line;
- checks half a bit later that the line is still low. If it isn’t, the edge was a glitch, not a start bit;
- samples each following bit in its middle, the point furthest from both edges, which tolerates the most clock mismatch and noise;
- checks the stop bit is 1. If it isn’t, that is a framing error, usually from the wrong baud rate or noise. The plugin draws those bytes in red.
Because it re-synchronises on every start edge, a timing error only builds up across one frame of about 10 bits, not across the whole message. That is why UART needs no clock line. A 5 % mismatch, though, would drift by half a bit by the last bits, and the samples would land in the wrong bit.
Variants
- 7E1: 7 data bits, even parity, 1 stop bit.
- 8N2: two stop bits.
- RS-232: the same framing with inverted ±12 V levels, which is
invert=Truein the decoder.
How it decodes
The decoder is in cicwave_uart/uart.py. It uses only numpy, so it can be
unit-tested without a display and used from scripts.
Threshold. The line is split into high and low halfway between its 5th and 95th percentiles, so a few glitches don’t shift the level.
Baud rate. The runs between edges are multiples of one bit time. The shortest runs are single bits, so the estimate is the mean of all runs shorter than 1.5 × the 5th-percentile run:
\[f_\text{baud} \approx \frac{1}{\overline{T}_\text{single bit}}\]On the demo capture this gives 115291 baud, 0.08 % from the true 115200.
Frames. The decoder follows the receiver steps above. From each falling edge on an idle line, it checks that the start bit is still low half a bit later (otherwise it was a glitch), then samples every following bit in its middle:
\[t_k = t_0 + (k + 1.5)\,T_\text{bit}, \qquad k = 0, 1, \dots\]The data bits are read LSB first, and the stop bit (and parity, if set) decide whether the frame is marked OK. The next start bit is searched for from half-way into the stop bit, so a slightly fast transmitter isn’t missed.
decode() also takes data_bits, parity ("even"/"odd"),
stop_bits, invert for an idle-low line, and a fixed level.
How it plugs in
Only cicwave_uart/__init__.py knows about cicwave. pyproject.toml
declares the entry point:
[project.entry-points."cicwave.plugins"]
uart = "cicwave_uart:register"
and register describes the plugin and adds the analysis:
def register(api):
    api.set_description("Decodes UART bytes from a waveform")
    api.register_analysis("Decode UART...", decode_uart)
decode_uart(window, wave) runs when the menu entry is chosen. It reads
wave.x and wave.y, asks for the baud rate, and draws into a tab from
window.add_analysis_tab():
frames = decode(x, y, baud, level=level)

tab = window.add_analysis_tab("UART: %s" % wave.key)
tab.plot(x, y, pen=pg.mkPen("c", width=1))
for f in frames:
    text = pg.TextItem(_label(f.value), color="y" if f.ok else "r",
                       anchor=(0.5, 1.0))
    text.setPos((f.start + f.stop) / 2, top)
    tab.pw.addItem(text)
tab.set_notes("%d bytes at %.0f baud\n%s" % (...))
Writing your own decoder
A decoder for another protocol (SPI, I²C, Manchester, a private bus) has the same two parts:
- a pure function from samples to frames, tested on its own. cicwave’s
test suite does this for the UART example (
UartExampleTestintests/unittests/test_plugins.py), encoding a message, adding noise and checking it decodes back; - an analysis that asks for any settings and draws the frames, registered
with
api.register_analysis.
A protocol with several lines, such as SPI’s clock and data, can find the
other waves in wave.wfile.df. To label parts of a recording as it loads
rather than on request, use an annotator instead; see
the plugin API.
screenshots.py in the example regenerates the pictures on this page.